Quick Choice: Which Kit Do You Need?
| Your Experience & Goal | Recommended Setup | Key Focus |
|---|---|---|
| First-time grower / Limited budget | Standard Complete Kit (2x2 or 2x4) | All-in-one setup, low noise, plug-and-play |
| Growing 4+ plants / Seeking yield | Complete 4x4 Kit with LED Array | PPFD uniformity (480W+), high CFM ventilation |
| Tech-savvy / Hands-off management | Smart Integrated Kit (WiFi/App) | Environmental automation (VPD, temp/humidity triggers) |
1. Why Choose a Grow Tent Kit?
Buying a tent and every piece of equipment separately means guessing at wattage, airflow, and compatibility on your own — and living with the consequences if you guess wrong. A kit removes most of that guesswork, but the value looks a little different depending on where you're starting from.
For Beginners
- Removes the difficulty of matching light, fan, and tent size on your own; Cuts down installation and troubleshooting time.
- Lowers the risk of buying the wrong equipment the first time; Avoids the common beginner trap of buying twice — once for the wrong gear, once for the right gear.
For Experienced Growers
- Get a pre-engineered equipment combination without redoing the math yourself; Save the time normally spent on load calculations and compatibility checks
- Rely on a combination that has already been tested for compatibility, rather than assembling one from scratch; Move more easily into a newer smart environmental control ecosystem.
A grow tent kit can also simplify purchasing by bundling multiple components into one package. Depending on what's included, it may reduce the need to source individual products separately—but always compare the complete configuration and total cost before buying.
2. What Is a Grow Tent Kit?
What Does a Typical Grow Tent Kit Include?
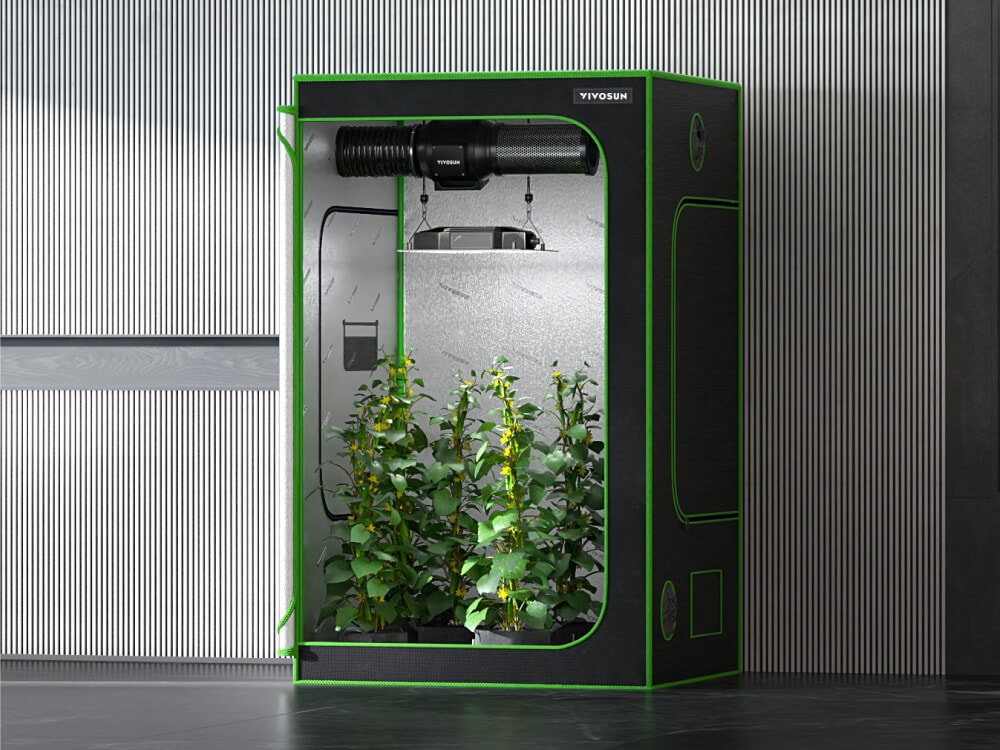
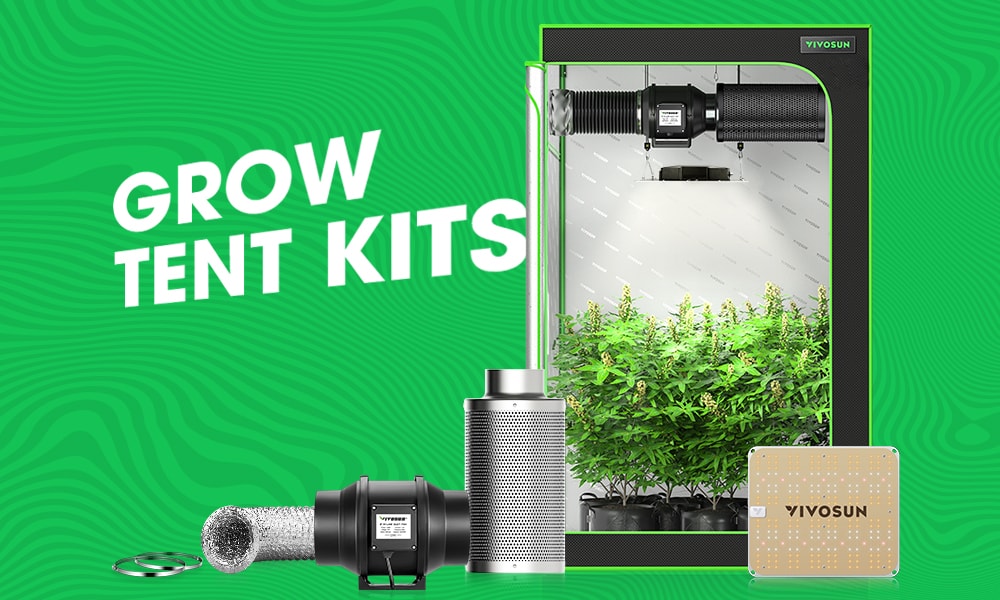
Grow tent kits generally fall into two configurations: Standard Kits, which cover the essential equipment for getting started and are ideal for beginners or budget-conscious growers, and Pro Kits, which add more advanced lighting, environmental control, and smart features for experienced growers or those looking for greater control and room to expand.
| Component | Standard Kit | Pro Kit |
|---|---|---|
| Grow Tent | Grow tent with essential features and standard ventilation ports | Higher-spec grow tent with more ports, stronger structure, and greater setup flexibility |
| Grow Light | Efficient LED grow light sized for the tent | Higher-performance LED with greater efficiency, coverage, dimming, and advanced control |
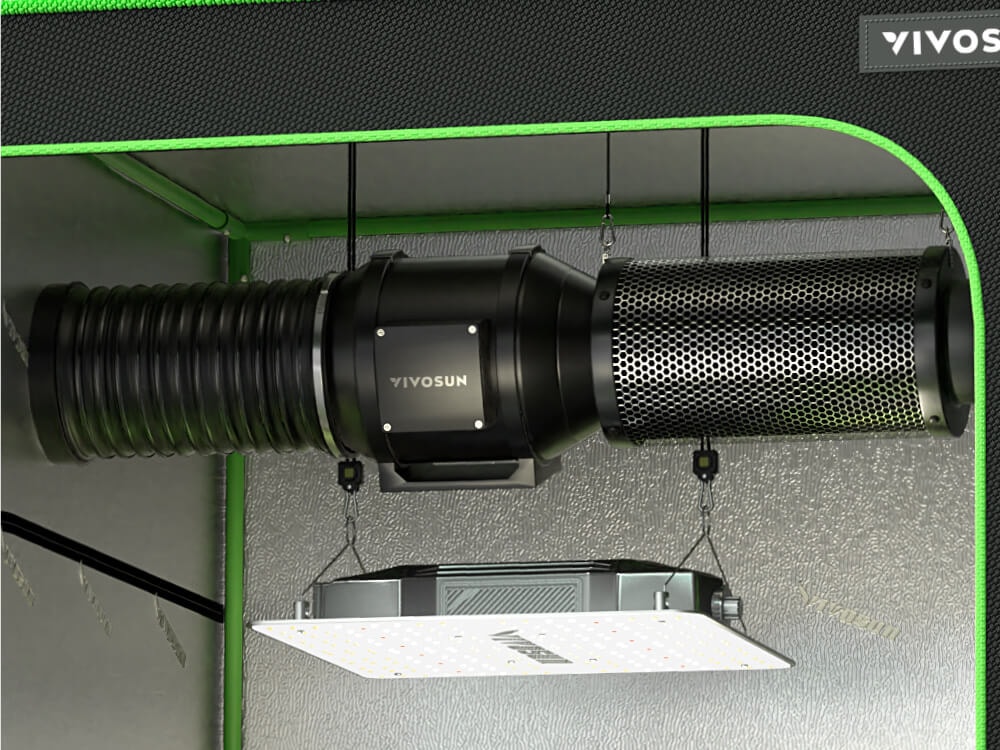
| Ventilation System | Inline fan, carbon filter, and ducting for basic air exchange | Higher-capacity or variable-speed ventilation system with improved airflow and control |
| Circulation Fan | Basic fan for maintaining airflow inside the tent | Advanced or smart fan with variable speed, oscillation, or automated control |
| Controller | Basic or optional controller for simple device management | Smart controller capable of coordinating multiple devices and environmental conditions |
| Sensors | Basic temperature and humidity monitoring | More comprehensive environmental monitoring and smart sensor integration |
| Ducting & Accessories | Essential ducting, hanging hardware, and installation accessories | More complete accessory package designed for easier installation and future expansion |
| Best For | Beginners, first-time growers, or growers with a limited budget | Experienced growers, automation-focused setups, or growers with a larger budget |
| Main Advantage | Lower upfront cost and simpler setup | More control, stronger integration, and greater upgrade potential |
Complete Kit vs. Partial Kit
- Complete kit: the core equipment is essentially all there — close to plug-and-grow once you unbox it
- Partial kit: covers some of the core equipment (often just tent + light, or tent + light + fan) but leaves other essentials for you to source separately
- Don't judge a kit by how many pieces it claims to include — check exactly what those pieces are. A "12-piece kit" that counts zip ties and a pair of gloves as two of those pieces isn't necessarily more complete than a 6-piece kit with a real controller and sensor.
Why Kit Configuration Matters
Different brands, and even different product lines from the same brand, can vary enormously in what a "kit" actually contains. More devices in the box doesn't automatically mean a better system — what matters is whether those devices are sized and built to work with each other. A kit with five components that are mismatched is worse than a kit with three that are properly matched.
3. Start With Your Growing Needs
Before you look at any single tent or kit, it helps to know what you're actually growing for. This shapes almost every decision that follows.
Growing Scale
How many plants, and in how many separate spaces? A single 2×4 tent solves a different problem than three 4×4 tents run in parallel.
Plant Type
Leafy greens, herbs, tomatoes, peppers, and flowering plants each have different light, temperature, and humidity requirements — this affects light spectrum/intensity choice and humidity control needs later on.
Growth Stage
Your equipment needs shift as plants move through stages:
| Stages | Requirment |
|---|---|
| Seedling | Lower light intensity, higher humidity, gentler airflow |
| Vegetative | Higher light output, moderate humidity, stronger air exchange |
| Flowering/fruiting | Peak light intensity, lower humidity, tighter climate control |
A kit whose light and fan can only run at one fixed setting will struggle to serve all three stages well.
Growing Method & Environmental Conditions
Your growing method and the environment around your tent can determine which equipment your kit needs. Choose a kit based not only on the tent size, but also on the conditions the equipment will need to handle.
Growing Method
- Soil / Fabric Pots: A standard tent kit with lighting, ventilation, and basic air circulation is usually sufficient. Choose a kit with enough floor space for your containers and room around them for airflow and maintenance.
- Hydroponics: Choose a kit that leaves enough space for reservoirs, pumps, tubing, and other hydroponic equipment. If the system includes smart environmental controls, make sure there is room to add water-quality or other relevant sensors.
- Coco Coir / Other Methods: Consider the additional equipment required by your specific growing method and make sure the kit has enough physical space, power capacity, and compatible connections for it.
- Aeroponics: Because aeroponic systems may require pumps, reservoirs, and additional monitoring equipment, prioritize kits with sufficient floor space, accessible power, and room for future equipment.
Environmental Conditions
- Hot Room: If the tent will be placed in a hot attic, garage, or other warm space, prioritize a kit with more capable ventilation and consider whether additional cooling will be needed.
- Cold Room: If the surrounding room is consistently cold, make sure the kit can accommodate heating equipment without creating space or electrical conflicts.
- High Humidity: In a naturally humid environment, prioritize stronger ventilation and consider whether a dehumidifier may be necessary. Make sure the tent has suitable ports and enough space for additional equipment.
- Poorly Ventilated Room: If the room itself has limited airflow, choose a kit with a ventilation system that can handle the space and check where intake and exhaust air will go before buying.
- Well-Ventilated Room: A room with good natural or mechanical airflow may require less additional environmental equipment, allowing you to focus on a well-matched core kit.
The key is to choose a kit that can handle your actual growing conditions rather than simply choosing the most powerful equipment available. Your growing method determines the equipment you need, while the surrounding environment determines how much environmental control capacity you may need.
Smart & Special Requirements
The right level of automation depends on how much control you want and how your growing space is used. Choose a kit based on the features you will actually use, while leaving enough room for future upgrades.
Smart Growing
- Basic Monitoring: If you prefer to manage the environment manually, a kit with basic temperature and humidity sensors may be enough. This keeps the setup simpler and lowers the upfront cost.
- Automated Control: If you want the system to respond automatically to changes in temperature or humidity, choose a kit with a compatible controller, sensors, and devices that support automatic adjustment.
- Remote Monitoring: If you cannot regularly check the tent in person, prioritize a kit with app-based monitoring, remote control, and alerts.
- Data Logging: If you want to understand environmental trends and optimize your setup over time, choose a system that records historical temperature, humidity, and other supported data.
- Advanced Automation: For experienced growers, look for a controller that can coordinate multiple compatible devices rather than controlling each device independently.
Special Requirements
- Noise-Sensitive Spaces: For bedrooms, apartments, or other noise-sensitive environments, prioritize quieter fans and variable-speed control. Check the fan's rated noise level rather than assuming a larger or more powerful fan will be quieter.
- Limited Space: Choose a tent and equipment combination that leaves enough room for installation, airflow, and maintenance. Compact equipment can be more useful than simply choosing higher-capacity components.
The goal is not to choose the most automated or feature-rich kit. Choose the level of control that matches your experience, daily routine, space, and budget, while keeping enough flexibility for future needs.
4. Check Your Space and Existing Equipment
Before choosing a kit, confirm that the tent fits your space and that its equipment works with what you already own.
Measure Your Available Space
Check the available width, depth, and height, including ceiling clearance and enough room around the tent for doors, walls, ducting, cables, and routine maintenance. A few inches of clearance can make equipment installation, heat dissipation, and daily access much easier.
Check Your Existing Equipment
If you're upgrading an existing setup, list the equipment you already have, such as:
- Grow light
- Inline fan and carbon filter
- Circulation fan
- Controller and sensors
- Dehumidifier or air conditioner
Then check whether the new kit allows you to reuse compatible equipment instead of unnecessarily replacing or duplicating it.
Match the Kit to Your Space and Existing Setup
Before buying, check:
- Size: Does the tent fit your available space with enough clearance?
- Ports & Connections: Are duct diameters, mounting points, and electrical connections compatible?
- Equipment Capacity: Can your existing equipment work effectively with the new tent?
Choosing the right tent size is the foundation for the rest of the kit. It affects light coverage, ventilation requirements, equipment placement, and future expansion.
Not sure how to choose the right tent size? Check this guide and you'll know exactly what you need.➡️The Complete Grow Tent Buying Guide for Beginners
5. How to Match Light Wattage and CFM to Your Grow Tent Size
This is where a lot of budget kits quietly cut corners — pairing components that don't actually match the tent they're sold with.
Tent Size vs. Grow Light Coverage
Don't buy on wattage alone — check the light's actual usable coverage area at your mounting height. A general reference range:
| Grow Room Size | Square Feet | Veg Wattage | Flower Wattage |
|---|---|---|---|
| 2' x 2' | 4 | 80 watts | 120 watts |
| 3' x 3' | 9 | 180 watts | 270 watts |
| 2' x 4' | 8 | 160 watts | 240 watts |
| 4' x 4' | 16 | 320 watts | 480 watts |
| 5' x 5' | 25 | 500 watts | 750 watts |
| 4' x 8' | 32 | 640 watts | 960 watts |
| 8' x 8' | 64 | 1,280 watts | 1,920 watts |
| 10' x 10' | 100 | 2,000 watts | 3,000 watts |
Treat these as starting points, not guarantees — actual coverage depends on the diode layout and reflector design, so check the manufacturer's PPFD/PAR map rather than wattage alone.
Tent Volume vs. Ventilation Capacity (CFM Calculation)
To ensure proper climate control and fresh CO2 delivery, your inline fan should exhaust the total tent air volume once every 1 to 2 minutes.
The Universal CFM Formula:
Required CFM = (Tent Volume in cu. ft.) × (Air Exchanges per Minute) × (Resistance Factor)
- Calculate Tent Volume: Length × Width × Height (e.g., 4' × 4' × 7' = 112 cu. ft.)
- Apply Resistance Factor:
- Add 20%–30% for carbon filter drag.
- Add 20% for ducting turns/bends.
- Rule of Thumb: Multiply raw volume by 1.5× for safety.
- Result: A 4x4 tent (112 cu. ft.) requires an inline fan rated at at least 170–200 CFM.
| Tent Footprint (7 ft tall) | Approx. Volume | Suggested Fan CFM |
|---|---|---|
| 2×2 ft | ~28 cu ft | 80–150 CFM |
| 2×4 ft | ~56 cu ft | 150–200 CFM |
| 3×3 ft | ~63 cu ft | 150–210 CFM |
| 4×4 ft | ~112 cu ft | 190–260 CFM |
| 5×5 ft | ~175 cu ft | 280–380 CFM |
| 4×8 ft | ~224 cu ft | 320–420 CFM |
Undersized ventilation leaves you fighting heat and humidity all season; oversized ventilation can over-dry the tent and create negative pressure problems.
Equipment Size, Placement & Mounting
Make sure each device fits within the tent without interfering with other equipment or reducing usable growing space. Check:
- Equipment Size: Light dimensions, fan/filter diameter, and the floor footprint of dehumidifiers or AC units.
- Placement: Leave enough room for the light, exhaust system, and other equipment without blocking ports, shading the canopy, or competing for mounting points.
- Ports & Ducting: Check the number and size of intake/exhaust ports, cable pass-throughs, and ducting connections. Make sure duct diameters match the equipment you plan to use.
- Mounting & Expansion: Check the number of interior hanging bars and whether there are enough mounting points for your current setup and potential future additions.
A well-designed kit should leave enough space for each component to operate and be serviced without competing for the same mounting points or blocking airflow.
Electrical Requirements
Check the total power and connection requirements of the complete setup before buying:
- Power Load: Add up the power requirements of the light, fans, controller, and climate-control equipment.
- Outlets: Make sure you have enough outlets for all devices and that plug types are compatible.
- Cables: Check whether power cords are long enough to reach your outlets without creating unnecessary extension or routing issues.
- Circuit Capacity: Make sure the combined electrical load is appropriate for the circuit you plan to use.
For larger kits, consider the entire system's power requirements, not just the wattage of the grow light.
6. Evaluate Each System in the Kit
A good kit should balance the performance of its major systems rather than maximize the specifications of any single component. When comparing kits, focus on the following key factors.
Grow Light System
Choose a light based on coverage, canopy-level intensity, and efficiency, not wattage alone.
- Coverage & PPFD: Make sure the light provides adequate coverage and intensity at the intended hanging height.
- Efficiency: Compare µmol/J to understand how much usable light the fixture produces per watt.
- Control: Look for dimming and compatibility with the kit's controller or app.
- Mounting: Check whether the recommended hanging height works for your tent and growing stages.
Ventilation System
Choose a ventilation system based on the actual airflow capacity of the complete setup, including the resistance created by filters and ducting.
- Airflow & Static Pressure: Check CFM together with static pressure performance rather than relying on open-air CFM alone.
- Filter & Ducting: Make sure the fan, carbon filter, and duct diameter are properly matched.
- Noise & Speed Control: For quieter operation and better environmental control, prioritize variable-speed fans with an appropriate noise level.
- Automation: If you want automatic climate control, make sure the fan can respond to temperature or humidity triggers through the controller.
Environmental Control System
Choose a control system based on what you want to monitor and how much automation you need.
- Sensors: At minimum, look for reliable temperature and humidity monitoring. More advanced systems may also support VPD and additional sensors.
- Controller Capacity: Make sure the controller can manage all the devices you plan to connect, with room for future expansion.
- Automation: Check whether the system can automatically adjust compatible devices based on environmental conditions.
- Data & Alerts: For smart setups, consider systems that provide data logging, remote monitoring, and environmental alerts.
Air Circulation System
Choose a circulation fan that provides adequate airflow without taking up unnecessary growing space.
- Airflow & Coverage: Make sure air can move effectively throughout the canopy rather than creating strong airflow in only one area.
- Placement: Consider whether the fan can be securely mounted without interfering with lights, plants, or other equipment.
- Speed & Oscillation: Variable-speed control and oscillation provide more flexibility for different growth stages and tent layouts.
- Size: Choose a compact design when tent space is limited.
7. Check System Compatibility
Core principle: a strong individual component doesn't guarantee a strong combination. Compatibility problems are usually invisible until everything is unboxed and installed.
A kit is only as good as the way its components work together. Instead of comparing each device separately, check whether the equipment is physically compatible, properly matched in performance, able to work together through the control system, and flexible enough for future upgrades.
Physical & Spatial Compatibility
Make sure the equipment can be installed together without competing for space, blocking airflow, or creating connection problems.
- Size & Placement: Choose equipment that fits the tent's usable space and leaves enough room for plants, airflow, maintenance, and other devices.
- Mounting: Check that the tent has suitable mounting points for the weight and installation method of each device.
- Ports & Connections: Match duct diameters, cable pass-throughs, power connections, and other interfaces before buying.
- Layout: Avoid setups where the light, fan, filter, or ducting compete for the same mounting space or interfere with each other.
Buying tip: Don't judge compatibility from individual product dimensions alone. Consider how all components will be positioned and connected once the entire kit is installed.
Performance Compatibility
The components should be sized to work as a balanced system, with no major component becoming a bottleneck.
- Lighting: Choose a light whose coverage and PPFD are appropriate for the tent footprint.
- Ventilation: Match fan capacity to the tent volume and account for resistance from the carbon filter and ducting.
- Environmental Control: Make sure heating, cooling, dehumidification, and ventilation capacity are appropriate for the room and growing conditions.
- System Balance: Avoid obvious mismatches, such as an undersized light in a large tent or a high-heat light paired with insufficient ventilation.
Buying tip: Compare the kit as a complete system rather than choosing the highest-spec component in each category. The weakest component can limit the performance of the entire setup.
Control & Automation Compatibility
If you want smart control, make sure the devices can communicate with the controller and support the functions you expect.
- Device Support: Check whether the controller supports the light, fan, sensors, and other equipment included in the kit.
- Control Functions: Confirm that connected devices support the functions you need, such as dimming, scheduling, variable-speed control, or automatic triggers.
- Controller Capacity: Leave enough capacity for the number of devices and sensors you plan to use, including future additions.
- Device Coordination: For advanced setups, look for systems that allow compatible devices to respond to shared environmental conditions.
Buying tip: Don't assume that a device is "smart" simply because it has an app. Check whether the controller can actually manage and coordinate the devices in your setup.
Cross-Brand Compatibility & Upgradeability
Mixing brands can give you more flexibility, but compatibility may be limited by connectors, controllers, software, or proprietary ecosystems.
- Mixed Equipment: Confirm that third-party devices can physically connect and operate with the rest of the setup.
- Adapters: Check whether additional adapters, cables, or controllers are required.
- Smart Features: Non-native devices may have limited access to the kit's automation or app features.
- Future Upgrades: Prefer systems that allow individual components to be replaced or expanded without requiring a complete system replacement.
Buying tip: If you expect to upgrade over time, prioritize an ecosystem with broad device compatibility and clear expansion options. If simplicity is more important, staying within one compatible ecosystem can reduce setup and integration issues.
8. Evaluate the Smart Control System
A smart control system should do more than monitor conditions—it should help compatible devices work together automatically. When comparing kits, focus on what the system can sense, what it can control, and how much automation and remote access it provides.
Sensors & Monitoring
Choose a kit with sensors that match the level of environmental control you need.
- Basic Monitoring: Temperature and humidity sensors are sufficient for simple setups and manual adjustments.
- Advanced Monitoring: If you want more precise environmental management, consider systems that support VPD, light intensity, CO₂, soil moisture, or other relevant sensors.
- Sensor Integration: Make sure the sensors can communicate with the kit's controller and provide the data needed for automatic adjustments.
Buying tip: Don't pay for sensors you won't use. Start with temperature and humidity, then choose additional sensors based on your growing method and control needs.
Why VPD Control Matters in Smart Kits
While basic controllers only monitor Temperature and Humidity separately, advanced smart controllers target VPD (Vapor Pressure Deficit). VPD measures how temperature and humidity interact to affect plant transpiration.
Selecting a smart kit with VPD-based automated triggers ensures your fans and humidifiers adjust dynamically through every growth stage, avoiding heat stress or high-humidity bud rot automatically.
Control & Automation
The key difference between a basic controller and a smart control system is how effectively it can coordinate compatible devices.
- Automation: Look for automatic adjustments based on live sensor data, such as changing fan speed when temperature or humidity reaches a set threshold.
- Scheduling & Presets: For more advanced setups, consider controllers that support schedules, day/night modes, or preset profiles for different growth stages.
- Device Coordination: Prioritize systems where compatible devices can work together rather than operating as separate, independent components.
Buying tip: If you only need simple on/off scheduling, a basic controller may be enough. Choose a more advanced system when you want multiple devices to respond automatically to changing environmental conditions.
Remote Control & Data Management
Remote access is most useful when you cannot regularly check the tent in person or want to track environmental trends over time.
- Remote Monitoring: Choose an app-connected system if you want to check temperature, humidity, or device status from anywhere.
- Remote Control: Make sure the app can control the functions you actually need, rather than simply displaying sensor readings.
- Data Logging: Historical environmental data can help you identify trends and fine-tune your setup over time.
- Alerts: For unattended setups, prioritize systems that can notify you when temperature, humidity, or other monitored conditions move outside your target range.
Buying tip: Choose remote features based on how much you rely on automation and how often you are away from the tent. For a setup you check daily, basic monitoring may be enough; for larger or unattended setups, remote alerts and control can provide much greater value.
Core point: a smart system isn't defined by having an app — it's defined by whether separate devices can actually respond to shared environmental data together.
9. Check What's Actually Included
Before comparing prices, check whether the kit contains everything you need to get started. A lower-priced kit may require additional equipment or accessories, while a more complete kit can reduce setup time and unexpected costs.
Core Equipment & Accessories
Check whether the kit includes the essential components for your setup:
- Core Equipment: Grow tent, grow light, inline fan, carbon filter, circulation fan, and controller.
- Sensors: Temperature and humidity sensors, plus any additional sensors required by the control system.
- Installation Accessories: Ducting, clamps, hanging hardware, connectors, and power cables.
- Controller Accessories: Required sensors, cables, or control modules.
What Will You Still Need?
Don't judge a kit by the number of items in the box. Check what you will still need to purchase separately, such as additional fans, sensors, ducting, adapters, or other accessories.
Buying tip: Calculate the cost of getting the setup fully operational, not just the advertised kit price. A slightly more expensive kit may offer better value if it includes the equipment and accessories you would otherwise need to buy separately.
10. Consider Long-Term Value, Support & Upgradeability
A good kit should work for your current needs while giving you a practical path to replace, expand, or upgrade individual components later.
Replacement & Upgradeability
Check whether individual components can be replaced without rebuilding the entire system.
- Can you replace the light, fan, filter, controller, or sensors independently?
- Can you add additional fans, sensors, or environmental equipment?
- Does the controller have enough capacity for future devices?
- Are replacement parts such as filters, cables, power supplies, and fan components readily available?
- Are newer devices compatible with the existing control system?
Buying tip: If you expect your setup to evolve, prioritize a modular system where individual components can be upgraded independently. If you want a simple, fixed setup, a less expandable kit may offer better value.
Brand Ecosystem & Support
Long-term value also depends on the brand's ability to support the system after purchase.
Look for:
- Clear warranty and replacement policies
- Accessible replacement parts
- Reliable customer and technical support
- Continued app and firmware support for smart systems
- Compatibility between newer and older devices
Buying tip: For a basic setup, prioritize warranty, replacement parts, and customer support. For a smart or expandable setup, also consider the strength and long-term compatibility of the brand's ecosystem.
Total Cost of Ownership
The real cost of a kit goes beyond the initial purchase price.
Consider:
- Initial Cost: Kit price and included equipment
- Additional Cost: Equipment and accessories you still need
- Operating Cost: Electricity and consumables
- Replacement Cost: Filters and other wear items
- Upgrade Cost: Future equipment and system expansion
Buying tip: Compare the total cost over the expected life of the setup rather than choosing the kit with the lowest upfront price. A more expensive kit can provide better value if it reduces additional purchases, operating costs, or future replacement costs.
11. Compare Kits Based on Your Priorities
Once you've checked the equipment, compatibility, and long-term value, compare kits based on what matters most to you rather than simply choosing the one with the most features.
| Factor | Standard Kit | Pro Kit |
|---|---|---|
| Best For | Beginners, simple setups, or budget-conscious growers | Experienced growers, larger setups, or growers who want more control |
| Setup | Essential equipment with a simpler configuration | More complete system with advanced equipment and controls |
| Automation | Basic monitoring or manual control | Advanced automation and device coordination |
| Expansion | Suitable for current needs with limited expansion | Greater capacity for additional devices and upgrades |
| Upfront Cost | Lower | Higher |
| Long-Term Flexibility | Best when your needs are unlikely to change significantly | Better for growers who expect to expand or upgrade |
Choose Based on Your Priorities
- Choose a Standard Kit if you are new to growing, want a straightforward setup, or want to keep the initial investment low.
- Choose a Pro Kit if you have more experience, want greater environmental control, need advanced automation, or expect to expand your setup.
- Choose a more complete kit if you want to minimize additional purchases and get started quickly.
- Choose a more modular kit if you already own compatible equipment or expect to upgrade individual components over time.
- Prioritize efficiency and operating cost if the setup will run for long periods or energy consumption is an important consideration.
- Prioritize compact equipment and quiet operation if the tent will be installed in a limited or noise-sensitive space.
Final Buying Checklist
Before purchasing, make sure:
- The tent fits your available space
- The light coverage matches the tent
- Ventilation capacity matches the setup
- Equipment can be installed without competing for space
- Ports, ducting, and electrical connections are compatible
- The controller supports the devices you need
- Required sensors and accessories are included
- You know what additional equipment you still need
- Individual components can be replaced or upgraded if needed
- Replacement parts and support are available
- The total cost fits your budget
- The kit matches your current needs and future plans
12. Frequently Asked Questions
How Should Beginners Choose a Grow Tent Kit?
Start from your space and growing goals, not from the flashiest kit. Measure your available area first, pick a tent size that fits it with clearance to spare, and confirm the light and ventilation included are actually sized for that tent — not just bundled with it. A complete kit with modest specs that all match each other beats a "high-spec" kit with mismatched components.
Is a Grow Tent Kit Cheaper Than Buying Equipment Separately?
Usually, yes — bundling typically comes with a discount versus buying each component at full price. But always factor in what the kit doesn't include; a cheap kit missing a controller, sensors, or a proper filter can end up costing about the same as a complete kit once you fill the gaps.
Is a Grow Tent Kit Ready to Use Out of the Box?
Complete kits get close to plug-and-grow, but "ready to use" still usually means you need to assemble the tent frame, hang the light and fan, connect ducting, and set up the controller/app — typically a few hours of work, not zero.
Does a Bigger Grow Tent Mean a Better Grow Tent?
No. A bigger tent that outsizes your light and ventilation performs worse than a smaller tent where everything matches. Size your tent to your space, plant count, and the equipment you can properly power and ventilate — not to the biggest option available.
How Do I Know if the Grow Light Matches the Tent Size?
Check the manufacturer's stated coverage area and PPFD/PAR map at your intended hanging height, not just the wattage number. Two lights with the same wattage can have very different real-world coverage depending on diode layout and reflector design.
Can I Use Equipment From Different Brands Together?
Sometimes, but not always without limitations. Physical connections (ducting, power) are usually fine with basic adapters; smart control integration between brands is the more common sticking point — some ecosystems support third-party devices, others don't.
Can I Upgrade Only One Device Instead of Replacing the Whole Kit?
In a well-designed kit, yes — components are meant to be replaceable individually. In a tightly bundled or proprietary system, upgrading one piece may require also replacing whatever it was directly wired or paired to.
Is a Smart Grow Tent Kit Always Better Than a Standard Kit?
Not automatically. A smart kit is worth the premium if you actually want automation, remote monitoring, or data logging. If you're comfortable checking and adjusting manually, a well-matched standard kit can perform just as well for less money.